LBE and Contents.
Before I start and I know some will ask what this is LBE = load bearing equipment.
This is what the military use to carry there equipment and is also known as web gear & webbing.
Before you all go out running to the nearest army navy store or going online and ordering the newest web gear out there you need to ask yourself a few questions.
Questions like what will you be using it for ? How much do you want to spend ? Do I really need that " special forces look a like " LBE ? You get the idea I hope.
If you are going to be looking to be involved in a firefight ( god bless you ) you would mainly think of only the basic’s like water a little food and then the rest would be ammunition.
However most of us will be using web gear as a add on to a BOB ( bug out bag see earlier posting) it will be designed to carry extra water, survival equipment, personal defense gear and a few other bits and pieces.
Everyone’s web gear is different from one person to another unless SOP states all web gear is to be the same. When you first look at a set of web gear you need to look at what you will be carrying and what size each object is. Then you basically just add pouches to the basic rig you buy. I would recommend at least 2 ammunition pouches just because this will be needed for personal defense. You really should carry at least 2 water bottles with a metal mug that fits onto one of the water bottles. A pouch should be designed just to carry survival gear. If you have room put a pouch with a drinks pack and 24hrs of food. Also add a good knife, a small first aid kit, a small hand saw, and most importantly some boiled sweets. Boiled sweets really help when you are tired and need to get a little boost. Many times have I been on long “ walks “ and these sweets have helped me.
This is a list of what I carry in my web gear.
Front right ammo pouches:
Reserve ammo
Rear right water bottle pouch:
Water bottle
Metal mug
Maglite
Puritabs
Middle rear water bottle pouch:
Drinks pack
Survival ration
Magnesium block
Left rear water bottle pouch:
Water bottle
Fishing kit
Millbank
Trioxane
First aid kit
Puritabs
Front left ammo pouch:
Main ammo ( both pouches )
Misc:
Lucozade sweets
Primary survival kit
Nomex gloves
Swiss army knife
Secondary survival kit
SAS survival manual
Electrical tape x2 rolls
Karabiners x2
Aluminum foil
Survival knife
If you have any questions arising from any of the posting we have made then feel free to email us and we will answer your questions to the best of our ability.
Please feel free to join this blog and add more to the list to help each other out.
Sunday, December 6, 2009
Saturday, November 21, 2009
Long Term Prep's
Long term prep’s.
Long term prep’s are basically a extended BIGGER version of the short term prep’s you have already put aside . However this will be made to last a very long time and the quantities you will be putting aside will be a lot bigger.
For example some people put aside in mylar bags over 200 lbs of white rice, pasta, or beans. This is poured from the original packaging into a new mylar bag and then some o2 absorbers are thrown in then you seal the opening. This if done properly will make the contents last unopened for many YEARS yes I said years.
Most people put the empty mylar bag into a 5 gallon bucket, pour in the contents they want to stock up on, put the o2 absorbers in then seal it , then they put the lid on to it and then just stack it up somewhere out of the way.
Things that can be put into mylar is basically anything …
however some items you don’t want to put the o2 absorbers into. Sugar and flour both turn into a giant block if you put o2 absorbers in to it. So these can just be squeezed top get most of the air out then sealed up. Or buy a mill and put aside wheat grain … which you can at a later time grind down into flour.
Other load term prep’s should be seeds non-hybrid so you can get the seeds from them the following year. As no mater what or how much you store it will run out sooner or later so you really should think about being able to grow your own food at some stage. You can buy if you look on the internet tinned seeds … in each tin you get packets of different types of non-hybrid seeds.
I hope this helps in some way, and please remember that this is just a quick guide. If you have any questions arising from any of the posting we have made then feel free to email us and we will answer your questions to the best of our ability.
Please feel free to join this blog and add more to the list to help each other out.
Tuesday, October 27, 2009
Short Term Prep's
Short term Prep’s.
Short term preps are exactly what you think they are.
They are what you personally think a short term event timescale might be, be it 1 week or 3 months.
The best things to put into a short term prep’s tote would be tins of foods you would normally use on a day to day basis be it tins of beans, fruit, spam … whatever. You then need to stock up on the other normal things like paper goods ( napkins, plates, etc ) Toilet paper is a MUST!
Beware that what goods you put in the short term tote MUST be rotated though the normal things you buy so it does not go out of date. As there is nothing worst then finding out all your prep’s when you need them most are out of date and are now useless.
Things like water can be stacked up in the case in a corner of a basement or somewhere you wont fall over it in a hurry. Remember 1 gallon of water per person per day for drinking IF they are not doing a heavy workload! In cases of a heavy workload increase to 2 gallons per day. This does not include water to flush the toilet!
Look for tins of things you eat that are on sale … thanksgiving, Christmas, spring sales are great times to get really good deals. When you next make dinner for your family look at how many servings you use of what, then add a tin to what you would normally eat and then you have a measure of how much per main meal you have to put away.
Remember to add a tin opener to the tote just in case you misplace your main one. ;)
Please feel free to join this blog and add more to the list to help each other out.
Monday, October 19, 2009
Kid's Prep's
Kids Prep's.
Hi There Mom’s and Dads
First of all, I am dedicated to the safety and well being of my family and daughter. The most important thing for me is to make sure that she will have everything she needs to A) keep her entertained. B) warm and safe. This is my idea of what I have put together for my daughter who is now 10 years old. Please remember when you are prepping for your children that you are prepped for age appropriateness. I can only suggest that if you have children of older ages, that they be very involved with preps. Our daughter is. She has assisted with our food preps as well.
1. put aside some “older” sweatshirts for her. Ones that they will not miss.. HAHAH..
2. I have actually put away one or two of her dolls.
3. I have a collection of coloring books ( dollar store)
4. Crayons. They are especially cheap now that kids are getting ready to go back to school. I just bought 4 boxes at Wal-Mart for .25 cents each. Can not beat that!!!
5. Batteries ( all sizes)
6. I have purchased a sleeping bag ( adult size.. These kids grow to freaking fast for me.. Hahah)
7. From the dollar store, I have put together an arts and crafts box for her as well. Again, all different things she enjoys doing.
Theory is this. If the kids are “entertained” we as parents can go on doing what we need to do to make sure everything is in order. As most parents can agree, the last thing we need or want are kids who are fighting, cranky, etc…
8. I actually put one of my daughters stuffies in the box as well. One she enjoys sleeping with. She has many others, so I knew if I ‘”RELOCATED” one or two she would not miss it. Hahah. Most kids don’t with all the stuff they have.
OTHER ITEMS THAT YOU SHOULD HAVE ON HAND FOR KIDS:
A. baby wipes again… plenty of them.
B. feminine products if your child is at that stage of the game.
C. soap for the kids.. My daughter has extremely sensitive skin and can not use just any products, so what she needs I have actually stocked up on. ( just remember to make sure you have spread sheet of what you have and there expiration dates. What I do is review it monthly and rotate if need be)
D. If your child is in diapers.. STOCK the up. If time comes, they will be very hard to come by. My suggestion is if you are seeing that what you have in the house is starting to get snug, bring out what you have in preps and buy bigger size. Especially for those kids who are potty training.
E. I would say to the parents of smaller children ages 0-4 … have an extra play pen put aside as well. If need be and your bug out area is of unknown territory at first, this way you can keep your kids closer to you.
F. If they are of reading age, I would suggest books that they can read, not many of course do to weight. However , my daughter is into her “teen beat” magazines, and even thou she has read them, I have put them away. You never know when one might come in handy.
This is a working progress for all. Please feel free to join our site and make as many recommendations as you like. This in the long run helps all of us out.
Ladies Prep's
Ladies prep's.
Hello Ladies:
I am here to help “assist” if I can, in some basic preps. Living in our own homes we tend to be very comfortable with our “daily” routine. Shower, blow dryers, make up, iron. Etc…. however, should the time come and TSHF… these “daily” routines will change dramatically. We will no longer be able to have our “daily” shower with our beauty products. Here are some simple items that should be in your prep boxes. This is what my personal kit contains. Now what I have done is gone to the local dollar store ( god knows there is one in almost every place you are and certain items it is great) Most of my preps are “travel” size. You don’t want to be carrying to much heavy stuff. Especially if you are moving about with kids. ( see kids sections for some great ideas)
1. Can of dry shampoo. Yes, they do make it. Most of the major chain pharmacy’s carry it. It is called PSSSST. It works great. The hospitals use it.
2. Feminine products. Please stock up on those. Tampons have many other uses as well.
3. Deodorant. I have several on hand just in case.
4. Bar soap. Now, I know most of us use the “liquid bath soap” however, that will not be in supply when needed.
5. Baby wipes and plenty of them. I go to the dollar store and stock up on them You can use them to “wash up “ in a hurry, lack of toilet paper. They especially work well when you have your period and there is no access to “daily “ showers.
6. If you have long enough hair to put up.. Keep plenty of scrunches around. I have a box of hair ties, bandanas etc…
7. At least 4 plastic disposable razors. They are also used for many different things then just shaving.
8. Sunscreen, It can actually double as a moisturizer for those who really must have it.
9. I also have packed sports bras in my bag, few pair of undies.
10. I also carry plenty of travel size naproxen ( I buy Walmart Brand) . It doubles as an anti inflammatory and pain killer.
You can pack your preps with your own products and what you see fit for you as an individual. Just remember stock up with preps, but make sure what YOU need to carry is not bulky or to heavy….especially if you are on the move.
Please feel free to join this blog and add more to the list to help each other out.
Wednesday, September 23, 2009
Practice makes perfect ...
Practice makes perfect ...
So here I was this evening sitting alone in the house bored then it came to me while everyone else is out now would be a good time to practice making a fire using just items out of the garden and my survival kit.
So i collected some dead twigs from around the bottom of some trees in the garden snapping them into small lengths, then i located some more slightly thicker twigs and so on making 4 small piles of different thicknesses of twigs.
then i had to find some tinder .... easier said then done as it had been slightly raining earlier.
i managed to find some cut grass that had been blown under the bushes in the garden. There wasn't alot but enough to hopefully get it started.
( looked dry so i had my fingers crossed there would be enough. )
Next i opened my survival kit.
Upon inspection i found i had several means to make fire so i started with my favorite. the magnesium block and striker. After shaving the block ( mental note to replace new magnesium block ) i made a small pile of shavings ready to put onto the tinder which i did.
after a few attempts of making sparks from drawing the striker down the flint section the sparks were flying ... but with the strong wind that was blowing the sparks werent really catching onto the tinder ... upon a very close inspection of the tinder i found that the tinder was ever so slightly damp so plan A went out of the window.
so i took out of the survival kit 1 piece of cotton wool ( i carry 3-4 pieces for this purpose ) and i fluffed it out and placed it into the middle of the tinder.
1 strike was all i needed to get the cotton wool to light ... but the damp tinder still refused toflare up even with a little extra help from me blowing on it while holding it all at head height away from myself. so i took out my candle that i use for this very purpose ( mental note to replace candle ) and with the still lit cotton wool i light the candle and using this i managed to get the fire going .
After this little problem ( the tinder ) adding the small twigs to build up the fire etc etc was easy.
Sitting there watching the fire burn away quite happlierly thinking about what could of done an how to improve i came to the conclusion that due to the wind an not as dry as i thought tinder hampened my efforts but using the contents of the survival kit and not just 1 part of it made me think and use what i had in the tin.
next time i do this i really need to find some really dry tinder or maybe some dead dry tree bark instead.
As always I hope this helps you in some way.
Please feel free to join this blog and add more to the list to help each other out.
Wednesday, September 16, 2009
Bug out bag's and contents
Bug out bag’s and contents.
Ok first thing you are going to ask is what is a bug out bag and what is its purpose . Well the answer is easy a bug out bag is exactly what the name says … it’s a bag that you grab when you have to bug out of a location . Aka a grab bag… this bag is meant to keep you alive and fed until you can get to your nearest cache of supplies.
Remember this bag is meant to be lightweight so you can move quite quickly while carrying it.
Anyway here is a basic contents of what you COULD put in it.
This is for a adult to carry … children should carry a extremely lightweight version of below… water / food / warm clothes / survival bag only!
Sample contents…
Bottles of water ( 4/5 )
A survival bag and /or a space blanket
MRE’s / food ( 4 )
Primary survival kit
Full change of clothes
Small wash kit
KFS ( knife fork spoon )
Metal mug
warm hat and gloves
A warm lightweight jacket
Ammuntion for your personal defence weapon
A cleaning kit for your weapon
Map and compass
F.A.K ( small first aid kit )
Mess tin
Bug spray
Drinks pack
Web gear
Waterproof jacket / trousers ( if warm jacket above not waterproof )
Any personnal vital medications
A small radio
A couple of tins of pet food if you intend on bringing your pet with you if you bug out.
This is just a example of what you COULD put in a bug out bag … in real life it is really down to personal choice what goes in the bag and what is carried by whom.
Options ...
Your options when an event happens … starve or survive!
When an event happens to you the first thing out of your month I promise you will be something like OH ####! So I decided to throw this little bit in between the topics that I stated when I first started this blog, just because I had a little extra spare time for once ! WOOHOO !
A government website states we should have 3 days worth of food and water per person in the household in case of a emergency as it will take the government this time ( 3 days ) to get help to us.
However as Hurricane Katrina proved that the government couldn’t get all the necessary support staff and logistics in place within there own stated timescale! So a lot of people suffered for a long time until the government help arrived.
So I personally suggest that you should try to stock up as much
food and water ( remembering that you want to be aiming for 1-2 gallons of water per person per day! )
Some people I know of have stocked up to over 1 yrs worth of food and water ( using bottled water and a high class water filtration system.
So I’d recommend at least 3 months worth of food for the household.
Yes I know your probably thinking right now “ what is he thinking! that’s a lot of food to buy , that’s a lot of money! “ however if you start buying a few extra cans and jars of items every time you go food shopping it soon builds up I promise you.
OH and make sure you only buy stuff you like to eat. Once you get to a nice base level say a months worth of tinned food think about buying rice in bulk like for example 50lbs as this will boost your amount of food supplies vastly! Also make sure you rotate out the tins of food as you don’t want to waste your money if food goes bad cause it goes out of date! Bulk food items can be stored in 5 gallon pales which are available from lowe’s or home depot for about $5 inc a lid.
This will hold about 30-40lbs of rice per pale.
Remember to get things that can be used to change the flavor of some foods like spices , oils , salts etc
don’t forget paper plates and cups and napkins as well …
This hopefully will get you started and pointed in the right general direction .
As always I hope this helps you in some way.
Please feel free to join this blog and add more to the list to help each other out.
Survival Kits
Survival tins also know as survival kits.
Survival tin contents is really a personal thing as some people like to have items others would never even think of having.
Also survival tin contents is not a fixed must have list. For example if you were in the desert and as there is no water then a fishing kit might not be the best thing to have in it. I hope you have the basic idea.
Any how here is what I carry in my tins.
Yes I said tins, I bet your thinking why does he have 2 survival tins an not 1.
Well the answer is easy if you think about it, you have a secondary survival kit which never leaves your person and the primary is stuffed into your gear that you carry. So if you are separated from your gear you still have a fighting chance using your secondary tin of surviving.
Anyway here is a list with explanations of what some of the items do.
Matches
Water purification tablets
Mini compass
Flint and steel
Candle
Wire saw
Knife
Signal instructions ( morse code / ground to air signals )
Small sharpening stone
Pencil and paper ( making notes / leaving messages / tinder )
Sewing kit
Fishing kit
Cotton balls
Whistle
Safety pins
Non lubricant condoms ( water storage / carrier )
Please feel free to join this blog and add more to the list to help each other out.
Sunday, August 16, 2009
Water.

Water.
So this morning I was going to post about water purification but then I find out that I had no water in my house what so ever! so on top of posting about water purification I am going to post about what you can do if you come across this type of situation.
Safe drinking water is a MUST have in a survival situation . So you need to have approx 1-2 gallons of water per person per day.
This is not enough if you are in a hot climate or are doing a lot of manual heavy work. As the body needs more water in this type of situation. Anyway if you find like I did that one day you have no water first things first you switch off the mains water so it doesn’t get drawn back into the main water line. Now tell everyone in family whom live in house to stop an think before they flush the toilet etc.
Now drain the hot water tank as there will be no cold water pressure to push the water around the house so drain the tank into containers that can be sealed tight. Now you have X amount of safe drinking / washing water.
You can remove the top of the toilet cistern so you can pour dirty water onto there to help flush the toilet. if possible use water that has been used to wash with, so it is not a waste. So anyway on with my next posting.
Water purification.
Okay this topic is IMPORTANT let me say that again this topic is IMPORTANT!!! .
If you mess this up in training the worst you’ll get is a bad stomach bug but in a survival situation this could mean your death! So I’d recommend you practice this over and over again!
But who am I to tell you what to do ;)
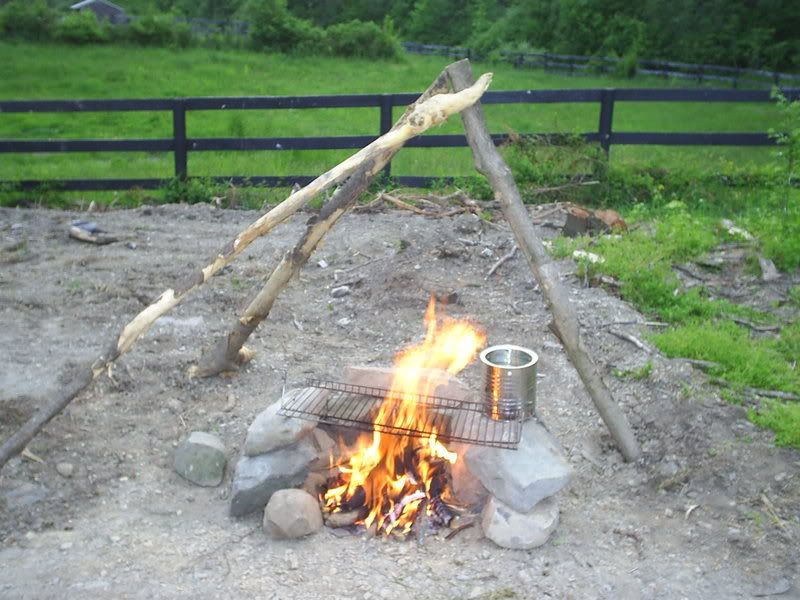
First things first it is possible to make drinking water from any water source. However I personally would recommend you stick to rivers or fast moving streams as these are easier to make into safe drinking water. However the following way works on most water sources.
You will need 3 large pieces of material the tighter weave the better and some string and 3 1“ thick 5 ft long branches.
Push the ends of each branch into the ground as much as possible.
Tie the ends together to make a teepee shape.
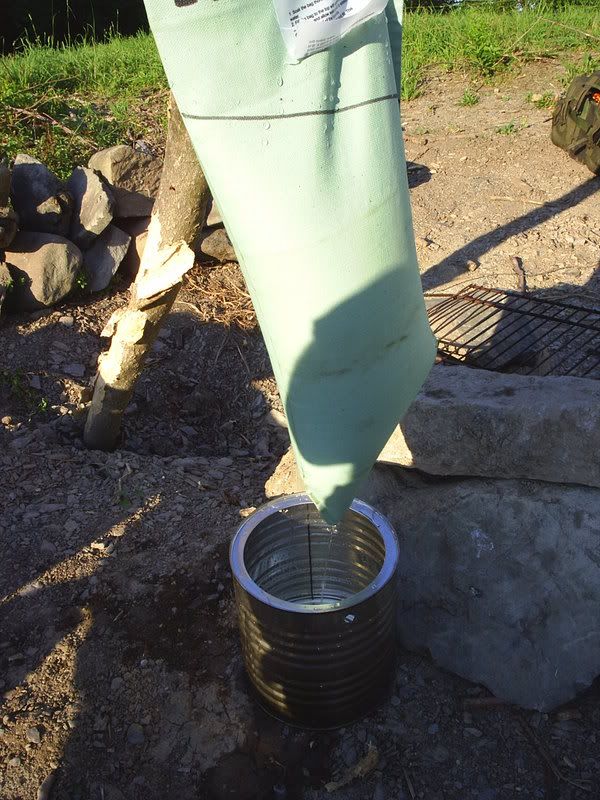
Now tie at different heights the 3 pieces of cloth so they sag slightly in the middle making them layer above each other.
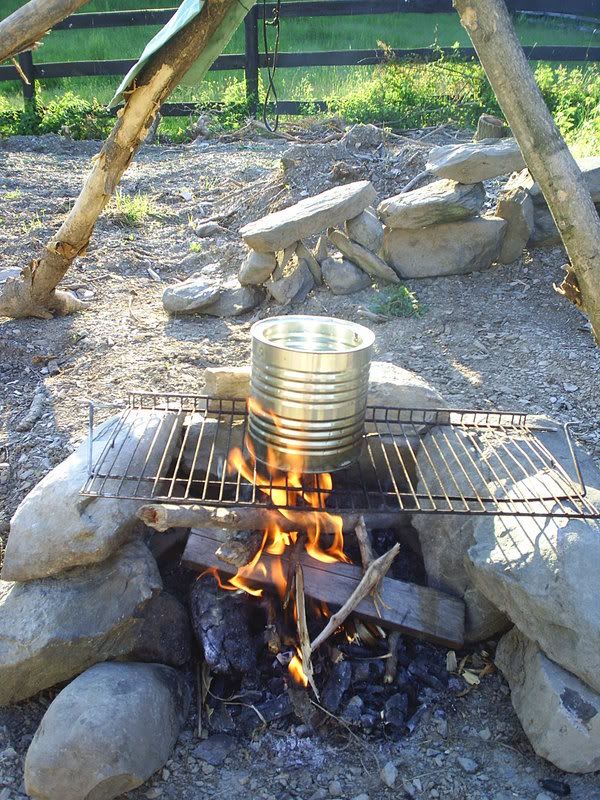
Now you have 2 options you can either just use this as it is by pouring the water SLOWLY onto the top piece of material until all the water has been put into it… now place your CLEAN container underneath the lowest layer of material and wait.
Once the water has dripped thru the 3 layers of material into your clean container you then boil this water for 3 minutes then leave to cool and then you have safe drinking water.
Option 2 is to put sand into the second layer of material and charcoal into the lower layer with leaves and grass in the top layer. Then do as above and pour the water in. The sand / charcoal / leaves and grass help filter the water more then without them but either way will work.
Now after all this if you are still unsure of the water put in a water purification tablet … shake the container with the tablet inside and follow the instructions on the bottle. But remember these tablets are a rare resource so in a survival situation they are to be used sparingly.
Now this is just a brief outline of how to do this using just one way. There are also many other ways to make safe drinking water. I would suggest you learn at least 2 other ways.
I hope this helps you in some way.
Please feel free to join this blog and add more to the list to help each other out.
Tuesday, August 4, 2009
Making Fire

Making fire.
Todays topic is as the title says making fire .
Man has been making fire since he was living in caves so if they could make it way back then , then we can do it nowadays.
Before we start to build a fire we need to decide how to make the fire ignite. There are many ways to do this from a simple use of a candle ( you light the candle with a match NEVER try to light a fire with a match as you just end up wasting them! ) another way ( my favorite one ) is the flint and steel. The rubbing 2 sticks together has yet to work as far as I know but I can say that making a fire bow really works! Even if you have a broken lighter as long as its sparking it can be used. Whichever one you decide to use make sure using it is second nature to you. I recommend that you learn more then 3 different ways to make fire and master each of them.
First items needed are the following: a means of making fire ( something like a BIC lighter to a flint and steel ) tinder (a birds nest works really well if you can find one ,but the shape is what your tinder should be looking like.), kinderling ,medium size sticks then larger sized sticks finishing up at logs.
Make sure you have a good sized pile of each BEFORE you start to make any type of fire.
All wood used to make fire MUST be dry!
If you have no dry wood to use then using your knife shave the wood making curls into the middle of the stick this is called making a fire stick. This will catch fire a lot easier even if damp.
Tinder can be almost anything. Dry grass, paper, cotton wool from your first aid kit , lint from your pocket, the list is almost endless.
Kinderling is very small sticks ( twigs ) shaved if necessary into the middle where the wood is driest.
Once you have a good amount of the burnable needed to make and sustain a fire you need to pick a suitable place to make a fire.
Wet ground wont help the fire!
Is possible set the fire up against something that wont burn but will reflect the heat from the fire back towards you like a stone wall or a pile of logs if they are approx 24” away from the fire. If you make a reflector it will also double as a windbreak and a way to dry damp/wet logs.
Anyway place tinder on the ground and fluff up the tinder ruffing up the edges so they will catch the sparks or fire more easy.
Next make a small wigwam out of kinderling around the tinder DO NOT SMOTHER the tinder with too much kinderling as the tinder needs air to make the fire grow.
Now using whatever means you have … be it a BIC lighter to a flint and steel light the tinder … BUT make sure all the rest of the wood is ready and close to hand …. Now that the fire has caught the kinderling … usually you can hear it crackerling add the next layer of wood and SLOWLY make the fire bigger until you are adding the larger sized pieces of wood.
Once you have the fire burning at the size you want it is very easy to run out of the correct sized pieces of wood so to help with this … try these 2 methods out.
On finding several large logs that cannot be cut put a end of each log into the fire you can do this to have upto 4 ends in the fire at any one time … if the fire looks like it is burning to fast pull out each log by like 6” this will slow the burn rate down … and if the fire looks like it will go out push these logs in more …. This way you can control the fire just by moving the logs into or out of the fire by only moving them a maximum of 6”.
The other method is placing the large log directly into the fire so the fire is burning the middle section of the log thus basically cutting the log into a more useable size. Once it burns thru remove one section and repeat if necessary.
This is of course a very brief outline on making fire if you wish to know more feel free to contact us and im sure we could arrange a demo so you can see this being done in person.
Please feel free to join this blog and add more to the list to help each other out.
Sunday, July 26, 2009
Making Shelter
Making shelter.
Most people have some sort of tent so making shelter is really easy for them … however for the rest of us we have many more options which are in some cases better.
I speak of a simple 12 x 12 ft tarp ( or bigger ). Yes a tarp!
This can be set up in a many ways as you can think of, from a simple tying the corners to 4 trees and tying a small smooth stone to the underside up in the middle then attaching a piece of cord to that so it raises the middle so if it rains it simply runs off! To making a complex shape which includes windbrakes and a ground sheet! The only limitations are your lack of creativity.
All you really need is atleast 1 good tree !
And once you need to break camp you can just roll up the tarp and walk away. No need for tent poles and other fancy equipment you just need some cord and tent pegs with a small hammer.
Once you compare the weight and the other uses that the tarp to the tent have you will see that the tarp has several advantages over the tent. ( unfortunately I cannot post any pics on the blog … not sure if it is even possible but im looking into it … to show you what can be made )
Please feel free to join this blog and add more to the list to help each other out.
Wednesday, July 15, 2009
Future Topics
Over the next few months we will be doing a different topic per post on one of the following subjects:
making shelter
making fire
water purification
short term food prep's
long term food prep's
communications
survival tins
basic first aid and first aid kits
self defense
ladies prep's
kids prep's
pet's prep's
options
bug out bag and contents
Cache's
LBE and contents
making shelter
making fire
water purification
short term food prep's
long term food prep's
communications
survival tins
basic first aid and first aid kits
self defense
ladies prep's
kids prep's
pet's prep's
options
bug out bag and contents
Cache's
LBE and contents
Tuesday, July 14, 2009
Here is where everyday local families can meet and mingle and share ideas and concerns of our current economical times and other issues. We are all concerned about loss of employment, loss of housing, etc. Together, we can "prepare" ourselves, our families, for any necessary changes in our lives that might occur. Being prepared doesn't cost a fortune and does not take a lot of time. It is as easy as doing your normal food shopping and adding on an additional can or two of your families favorite thing. It is as simple as spending a day in the kitchen with the kids and making your own jam's or your own sauces.
There are many way's of being "prepared" for almost anything.
Please understand... WE ARE NOT.. a Militia Group. We are NOT against our Government, we are NOT a cult,.. Again, we are just friends and families getting together making sure that we are secured for what "ever" comes our way.
Any information obtained, is that of "OPINION" only. We are NOT responsible for anyone but ourselves. We are NOT lawyers, Law Enforcement, etc... So please, check with your local Law Enforcement authorities for any clarification that you might need. We are all here on a voluntary basis, there is NO ONE saying you should or should not be here. However, by choosing to be here, is one step closer to being prepared
Subscribe to:
Comments (Atom)